Tip of the Week: Make a Floral Bouquet as Did Emily Dickinson
Posted in Gardening Tips on April 26 2010, by Sonia Uyterhoeven
Botanical Crafts Series: Create a Victorian-Era Tussie-Mussie
 |
Sonia Uyterhoeven is Gardener for Public Education. Join her each weekend for home gardening demonstrations on a variety of topics in the Home Gardening Center. |
Beginning Friday, this spring we will be paying tribute to the great 19th-century American poet Emily Dickinson in the exhibition Emily Dickinson’s Garden: The Poetry of Flowers. Her poetry personified and celebrated the fauna and flora of her life in pastoral Amherst, Massachusetts.
Emily Dickinson was an avid gardener and an amateur botanist. She strolled through the countryside collecting wildflowers, taking them home, and carefully drying and pressing them into the pages of her poetry and correspondence, as well as creating a herbarium of over 400 specimens. When an important visitor was expected, she presented them with floral tokens and a few lines of verse as a welcoming gift.
Dickinson’s study of botany and an appreciation of the crafts associated with it was part of a well-established Victorian tradition for women of the educated classes. Over the next few weeks we will sojourn back into history and explore some Victorian pastimes that are still popular in the craft world today.
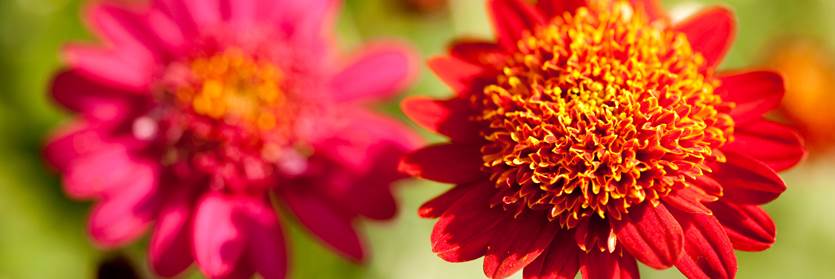
Small floral bouquets, sometimes referred to as nosegays, posies, or tussie-mussies, have been around for centuries. They are small, handheld bouquets about four to six inches across, although they can be larger.
Nosegays derived their name from medieval times when the fragrant bouquets were carried to ameliorate the stench on the streets. Nosegay quite literally meant a gay nose. A posy was either a gift of verse or a small bouquet, and the name tussie-mussie came from a 15th-century rhyme: tusse, a cluster of flowers or tussock, a tuft of hair, and mussie, the moss that wrapped the base.
Throughout history, nosegays have mimicked fashion trends. In Elizabethan times, when women wore gowns with high lace collars, their nosegays were packed with dense bands of flowers and finished with stiff lace doilies.
In 17th-century Versailles, when necklines plunged and fashions became softer, nosegays followed suit. Bouquets were adorned with silky ribbons, transforming them into the perfect accessory for an elegant courtier. They were often held in cone-shaped holders made of gold, silver, or other precious materials such as ivory. Attached to the posy holder was a chain with a ring that slipped over a finger. A pin was fixed inside the device to hold the posy in place.
During the Victorian era, posies or tussie-mussies were all the rage. Early in the 19th century these bouquets were fairly uniform, with a large flower or cluster of flowers in the center, surrounded by concentric rings of smaller flowers, herbs, and foliage. By mid century the fashion in posies was more relaxed. Flowers were often clustered in blocks of color, providing an alternative to the standard circular configuration.
Color combinations also changed over time. In the 1850s and 1870s, color harmonies and subtle pastel blends were popular. During the 1860s, contrast was in favor, and complementary colors were placed next to each other—red with green, yellow with purple.
Victorian nosegays were tightly packed with flowers, herbs, and foliage. A lacy doily or bouquet paper often surrounded the arrangement. The stems were wired to a slender twig for support and covered with damp moss. The bouquet was then placed in a posy holder or wrapped with ribbon and held in a handkerchief.
How to Make a Tussie-Mussie
As in every craft activity, there are many ways to make a small floral bouquet. Find the one that suits your style. Below are some basic guidelines to get you started.
If possible, condition your flowers for several hours or overnight. Cut ½ inch off the stems on a diagonal to allow maximum water uptake. Place the flowers in tepid water with flower conditioner, and set the container in a cool, shady spot in your home. This allows the flowers to take up water and keeps them fresh and firm.
Floral Candidates
Roses (spray or large); carnations; lavender; button mums; small asters; globe amaranth; bachelor’s buttons; yarrow; baby’s breath; statice; rosemary; mint; basil; parsley; fennel; sage; ferns; dusty miller; tree leaves; scented geranium leaves; lamb’s ear leaves; ivy.
Beginner’s Approach
1. When you are ready to make your tussie-mussie, cut the flowers so that the stems are 4–6 inches long. Cut stems with a pair of pruners or sharp scissors. Remove all of the foliage. It might be easier for you to arrange with longer stems and then cut the bouquet afterwards.
2. Take the largest flower and hold it in your left hand. Add a second layer of flowers or herbs, slowly rotating the bouquet as you go. Add a third layer by continuing to rotate the bundle, adding more flowers and herbs. For the final layer add some foliage. You will be wrapping the flowers in a circular motion creating a spiral.
3. Secure the stems with a rubber band. Take the rubber band and slide it over 2–3 stems. Then coil the rubber band several times around the entire bundle of stems, sliding it over 2–3 more stems towards the end of the bunch. The rubber band will look as if you twisted a wire around the stems. You can also wrap the stems with floral wire or pipe cleaners.
4. (Optional) Take a paper doily. Gently fold in half and make a straight 1–1½ inch cut through the center. Unfold, fold in half in the other direction, and make a similar cut. You will be making a small X cut in the center of the doily that you can slide the stems through. The measurement of the cut will depend on the diameter of your bundle of stems. Secure doily with florist pins.
5. Cover the base of the stems with damp sphagnum moss or a damp paper towel. Wrap with either aluminum foil or plastic wrap. Camouflage wrapper with a ribbon or handkerchief.
Tips
If you are handy with floral arrangements, you can wrap the initial stem with floral tape and secure the other stems with tape as you go. Remember to stretch the tape so that the tension is good and the bundle sticks together. The stems should be dry when you work with floral tape.
Wrap with moss and plastic wrap. Cover plastic wrap with floral tape. Starting from the top, stretch the tape and wind down the stem diagonally, overlapping as you go. If this is too labor intensive, you can wrap the different layers of flowers rather than the individual stems with pipe cleaners or florist tape. The more stems you wrap, the sturdier the bouquet will be. Decorate with ribbon.
For a wonderful history of tussie-mussies and some excellent ideas for making your own small bouquets and floral messages, see Geraldine Laufer’s Tussie-Mussies: The Language of Flowers.
