Tip of the Week: Using Pressed Flowers
Posted in Gardening Tips on May 24 2010, by Sonia Uyterhoeven
 |
Sonia Uyterhoeven is Gardener for Public Education. Join her each weekend for home gardening demonstrations on a variety of topics in the Home Gardening Center. |
The craft of flower pressing began hundreds of years ago in China and Japan, where flowers were pressed between sheets of rice paper weighed down with heavy stones. Pressed flowers were highly valued for their decorative qualities.
In the West, plants were collected and pressed for scientific as well as ornamental purposes. Botanists created herbaria, collections or libraries of pressed plants, for research and teaching. With proper care, these collections preserve plants for centuries. When in her teens, Emily Dickinson created her own herbarium, a digitized version of which can be seen in the Gallery exhibition of Emily Dickinson’s Garden: The Poetry of Flowers.
Collecting and pressing flowers was a popular pastime in the United States during the 19th century, when there was an abundance of open land. Today urbanization and the damaging effects of herbicides and pesticides threaten our native flora. It is important when collecting plants to make sure that they grow in abundance. Never collect plants in parks or protected areas. The best place to collect is in your own garden.
Pressing flowers is a beautiful way to preserve memories of the growing season. The decorative uses for pressed flowers are limited only by your creativity. They can be framed or used to adorn note cards, writing paper, book covers, bookmarks, paperweights, candles, placemats, and more.
Getting Started
Collect flowers and foliage when they are at their peak. Look for perfect specimens and collect them on a dry sunny day. The best time to collect is late morning after the dew has burned off. Flowers and foliage that are damp are likely to get moldy during the pressing process.
Pick more material than you think you need. Flowers and foliage often get damaged during the pressing process, so make sure you have a good selection of flowers and foliage in a variety of sizes.
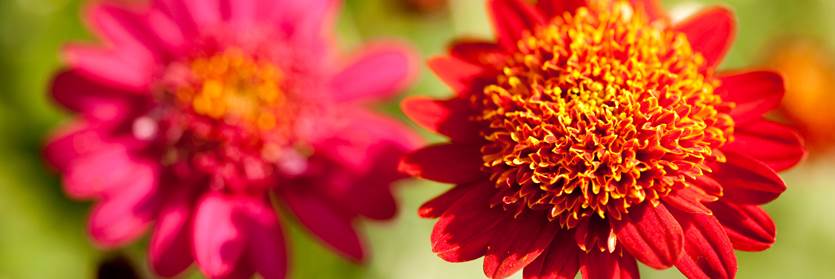
Many flowers lose their color when they are pressed. Yellow, white, orange, and pale flowers tend to keep their color, while dark red, violet, and purple flowers fade or change to gray or brown. Foliage also tends to discolor except for silver foliage, which holds its color nicely.
Plants lose their color when pressed because bacteria and fungi feed on plant tissue, causing it to break down. Most of these microscopic organisms need moisture to thrive, so the faster the plant dries the better. There are many tricks to speed up the drying process, ranging from the traditional approach of changing the absorbent paper frequently to the modern method of using the microwave oven.
If your flowers or foliage fade, you can brighten them up with a watercolor wash. If the watercolors do not adhere to the surface, add a few drops of liquid detergent to the paint. Another tip is to use wet and dry paint brushes in sequence, removing excess color with the dry brush to create a natural effect.
Flowers
Some favorites are apple blossoms, asters, buttercups, campanula, chives, clover, columbine, cosmos, daisy, forget-me-nots, goldenrods, lily of the valley, primroses, snowdrops, viola (pansies).
Foliage
Some favorites are coral bells, dill, ferns, grasses (flowers and foliage), ivy, maple leaves, oak leaves, sage.
Designing with Pressed Flowers
Pressed flowers are very fragile and are best handled with a pair of tweezers. Store them in a shoebox or other protective container until you are ready to use them.
Try out your arrangement on a separate piece of paper before you glue flowers to the cardstock, construction paper, or any final surface.
Use white PVA glue such as Elmer’s™ or Unibond™. These glues are colorless when dry, fairly odorless, and easy to use. You can thin the glue with water to make it easier to apply. Pour the diluted glue on waxed paper or aluminum foil, dab it on the flower petals with a wet paint brush or toothpick, and fasten the flowers to the cardstock.
When your arrangement is completed it is best to protect your dried flowers within a frame or cover them with varnish or some type of adhesive film such as clear contact paper. You can find all of these supplies at a craft store.
A good tip is to start with simple designs until you get the feel for what you are doing. Choose a color theme and use only a few flowers and leaves. Colored backgrounds or mounting paper give additional color to your creations.
One easy project for beginners is to decorate a large box of matches. Glue a piece of cardstock or thick paper to the surface of the match box, then glue on your pressed flowers. Once the glue dries, cover the floral design with a layer of clear adhesive paper cut to size. Bookmarks are just as easy and can be finished by punching a hole at the top and attaching a colorful ribbon.
Note cards can be decorated by pressing dried flowers in waxed paper and then attaching them to the note card or by gluing the flowers directly onto the paper and coating them with an acrylic sealer. Several products to look for are Crystal Clear Acrylic™, DMP™ (Dried Material Preservative); and Perfect Paper Adhesive™, which functions as a transparent adhesive and sealer.
Next week I’ll write about some of the techniques and way to press flowers.
