Inside The New York Botanical Garden
Sonia Uyterhoeven
Posted in Gardening Tips on June 1 2009, by Sonia Uyterhoeven
A Caribbean Cocktail: Tropical Plants in the Home Garden
 |
Sonia Uyterhoeven is Gardener for Public Education. Join her each weekend for home gardening demonstrations on a variety of topics in the Home Gardening Center. |
 Tropical plants make wonderful specimen plants for a container or a welcome and exotic addition to your perennial border. Cannas and bananas are two of the most popular candidates. Both thrive when placed in sunny conditions away from the wind. Many of the variegated cannas such as Canna ‘Stuttgart’ do best when given some afternoon shade.
Cannas can either be grown as annuals or overwintered indoors. Once the frost cuts back the cannas, the rhizomes can be dug up and stored in slightly damp peat moss or in vermiculite in a cool, dark area for the following year. Banana should be potted up and also stored in a dark, cool area (below 55° F). The plants go dormant but should not dry out completely (check moisture levels once a month). Move them outside once it warms up or transition them slowly on an enclosed porch or greenhouse in spring.
There are many other tropical plants on the market these days that will set your garden on fire. Hibiscus ‘Maple Sugar’, as the name suggests, has dark maroon maple-like foliage. It complements cannas nicely and its deep tones add striking contrast to any combination.
Some other dark foliage favorites include Persian shield (Strobilanthes), purple spiderwort (Tradescantia), and Joseph’s coat (Alternanthera). Persian shield can handle drought, deer, and rabbits. Its foliage presents a glowing combination of purple, silver, and green, making it a vibrant addition to any perennial garden. To create a sophisticated color echo in your border, pair it with silver foliage such as dusty miller (Senecio), wormwood (Artemisia), or plectranthus (Plectranthus). If the foliage is getting too ungainly just pinch it back to create a more compact specimen.
Read More
Posted in Gardening Tips on May 26 2009, by Sonia Uyterhoeven
It’s Time for the Chelsea Chop
 |
Sonia Uyterhoeven is Gardener for Public Education at The New York Botanical Garden. Join her each weekend for home gardening demonstrations on a variety of topics in the Home Gardening Center. |
For those of you who grow sweet peas from seed, you will know from experience that once the seedlings reach 4–6 inches tall, you need to pinch them back to approximately half their height to encourage good branching. Some people pinch just once, other pinch twice— like most things in gardening, method is often based on personal preference.
If pinching seedlings with your fingertips sounds too dainty, then just wait until late May or early June, the time to grab your sheers or pruners and try them out in the garden on a larger and more satisfying scale…but not on your sweet peas, please.
In England they call cutting back perennials the “Chelsea Chop.” This is because the time for cutting back perennials lands on the same week of the famous Chelsea Flower show (the third week of May). Cutting back some (not all) perennials early in the season encourages lateral growth and produces nice and bushy (if not slightly shorter) plants.
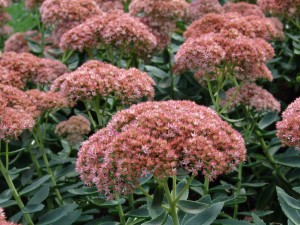
What are some candidates for this treatment?
Sedums (Sedum), pictured: Chop them in half in late May and you will prevent them from opening up and falling over later in the season.
Montauk daisies (Nipponanthemum): They often relish being chopped twice in the season, which keeps them from splitting open once they are in bloom.
Asters (Aster) and chrysanthemums (Chrysanthemum): If you are meticulous and have just a few, you can pinch them by hand by taking your thumb and forefinger and pinching off the growing tip of the plant (generally a half inch to 2 inches from the top). Let the plant grow a couple weeks until it puts on 2 or 3 nodes and then pinch again. For those of you who are as impatient as I am, just chop them in half once and then walk away.
Read More
Posted in Gardening Tips on May 18 2009, by Sonia Uyterhoeven
How to Water Newly Planted Trees
 |
Sonia Uyterhoeven is Gardener for Public Education at The New York Botanical Garden. Join her each weekend for home gardening demonstrations on a variety of topics in the Home Gardening Center. |
Newly planted trees are thirsty for water. On the day of planting, give them a deep soaking; then come back the next day and soak them again. The ground around the root ball of the tree will take up most of the water from the first day, and the second watering ensures that the root ball gets soaked.
If you walk around The New York Botanical Garden, you will notice that around newly planted shrubs and trees is a small berm of soil (part of the backfill). What we have done, basically, is to build a saucer around the woody plant that will help retain water.
The saucer should be the size of the root ball. When water is added to this makeshift well, it penetrates into the root ball (and hence the roots) rather than seeping into the disturbed soil around the plant. The berm should be broken down after several months and certainly by the end of the growing season. Distribute the soil away from the tree so that you do not alter the soil level around the root ball
The easiest way for a homeowner to water a newly planted tree or shrub is to lay a hose at the base of the tree and run a slow trickle of water for several hours until the soil is thoroughly soaked. It is better to water your tree once a week with a deep soak than to water it frequently for a short time (which produces a shallow, weak root system).
For additional tips on watering newly planted trees…
Read More
Posted in Gardening Tips on May 11 2009, by Sonia Uyterhoeven
Lovely Lilacs for the Garden
 |
Sonia Uyterhoeven is Gardener for Public Education at The New York Botanical Garden. Join her each weekend for home gardening demonstrations on a variety of topics in the Home Gardening Center. |
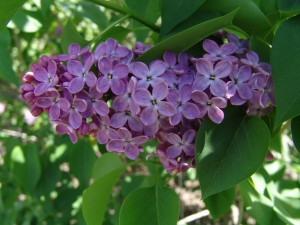 Lilacs have been a staple of the home garden for hundreds of years. They flourished and were coveted by founding fathers such as Thomas Jefferson and George Washington. The popularity of lilacs comes as no surprise—they are easy to grow, wonderfully fragrant, and produce beautiful, blousy flowers from late April into June (depending on the cultivar).
The common lilac (Syringa vulgaris) is also known as the French hybrids from important hybridizing work that was undertaken in France in the 19th and 20th centuries. This lilac, indigenous to Eastern Europe, is the image we conjure up when we think of lilacs. It has elegant heart-shaped leaves and large, fragrant flowers, typically in white or purple. Another common lilac is the early flowering hyacinth lilac (Syringa x hyacinthiflora). This is a cross between the common lilac and an Asian species. It flowers up to 10 days earlier. It looks very similar to the common lilac and has fragrant single or double flowers.
Tree lilacs (Syringa reticulata) are wonderful disease- and pest-resistant plants. These large lilacs can easily grow up to 20 feet tall. They have creamy white flowers that appear in June and lovely ornamental bark.
Meyer or ‘Palibin’ lilacs (Syringa meyeri) and the Manchurian lilac (Syringa patula) are two dwarf varieties that make excellent garden additions to beds and borders and are often used as screens or hedges. Their height ranges from 4 to 8 feet, and they produce pale mauve flowers in late May to early June. The popular cultivar ‘Miss Kim’ (Syringa patula ‘Miss Kim’) is one of the few lilacs that have a wonderful fall color—a deep burgundy.
For tips about growing lilacs…
Read More
Posted in Gardening Tips, NYBG in the News on May 4 2009, by Sonia Uyterhoeven
Going Native: Azaleas for Everyone
 |
Sonia Uyterhoeven is Gardener for Public Education. Join her each weekend for home gardening demonstrations on a variety of topics in the Home Gardening Center. |
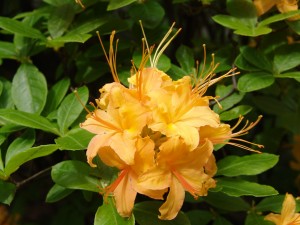 Spring is a season of anticipation and joy. Cheerful bulbs emerge from the ground and cover the landscape with color. Flowering trees and shrubs follow suit in one of the year’s most magnificent displays. As the season unfolds, everything takes its turn providing a symphony of color—magnolias, flowering cherries, azaleas, redbuds, lilacs, and crabapples.
One of my favorite players is the native azalea. It is a versatile plant that is often overlooked by the homeowner. Native azaleas are known for their spectacular bloom in spring. Many are incredibly fragrant, often with a spicy clove scent. A number of them also provide a wonderful show in the fall, with leaves ranging from yellow and burnt orange to fiery red.
Native azaleas have a graceful form that adds height and structure to any woodland garden. Most native azaleas grow from 5 to 8 feet tall, with some of them stretching to 10 feet at maturity. They rarely need any pruning, just an occasional thinning out of congested branches or removal of dead wood. Prune immediately after flowering.
To learn more about native azaleas…
Read More
Posted in Gardening Tips on April 27 2009, by Sonia Uyterhoeven
Woolly Adelgid
 Sonia Uyterhoeven is Gardener for Public Education at The New York Botanical Garden.
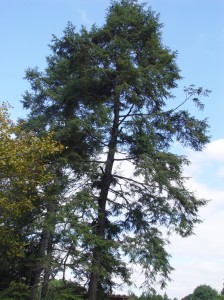 Who’s afraid of the hemlock woolly adelgid? Certainly, many gardeners in the Northeast. Like many pests that plague us, these little creatures were introduced from abroad. In their homeland (Japan) they are kept in check by a type of ladybug that is a natural predator. Here in the United States, though, the woolly adelgid has free range. The only natural challenge it faces is extreme temperatures—once the thermometer drops below 23°F or -5°C, the mortality rate of these fluffy little critters rises.
So what is hemlock woolly adelgid and why should we be concerned? This pest spends most of its life protected under its telltale fluffy white secretion. You probably have seen it cover the branches of hemlocks. It plants itself at the base of the needles and slowly sucks the sap—and life—out of a tree. This can take anywhere from 1 to 15 years, depending on the tree and environmental situations. While many pests target unhealthy and, therefore, susceptible trees, this pest prefers healthy ones.
For those of you who have grown up on the East coast, as I have, you will appreciate the importance of the Eastern hemlock (Tsuga canadensis) in the landscape. For the homeowner, it is one of the few conifers that make an outstanding addition to a shady border. It has delicate foliage, it can withstand hard pruning, and its lower branches often reach down to the ground, creating a nice, full specimen. It is an important screening and landscape plant.
What you may not have thought about is the important role that it plays in the ecosystem. This shade-tolerant tree grows slowly into giants in the forest, creating cool, shaded areas by stream and river beds that allow many fish and aquatic invertebrates to thrive.
To learn what you can do to help your hemlocks fight the woolly adelgid…
Read More
Posted in Gardening Tips on April 20 2009, by Sonia Uyterhoeven
Caring for Mother Earth
 Sonia Uyterhoeven is Gardener for Public Education at The New York Botanical Garden.
This week we commemorate Earth Day. Celebrate the life on this planet yourself by spending time in your garden. Forget the heavy chemicals and fertilizers. Sometimes they do have their place, but more often than not a healthy, well-maintained garden is all you need.
Here are some ways to help the planet.
- Make your own compost. With compost you will be essentially giving your garden all the nutrients it needs. Compost is basically a mix of “browns” and “greens.” Browns are lifeless, carbon-rich materials such as autumn leaves, straw, and wood chips. Greens are fresh, nitrogen-rich materials such as weeds and grass clippings. Pile up your compost so the mound is able to retain heat and moisture, allowing the composting organisms (the critters and microorganisms that break down the material) to thrive. Never place weed seeds in the pile unless you know how to heat up the pile to kill them off, otherwise you may inadvertently end up spreading them in compost around your garden. To speed up the composting process, chop the material into small pieces. Turn the pile occasionally and add water if you are going through a long, dry spell. Never introduce meat scrapes or vegetable oils into the pile; otherwise you will attract unwanted pests.
- Add aged manure to your garden. Apply it particularly around roses and in your vegetable garden to give plants a nutritional boost. You can buy either bagged manure or farm manure. If it is straight from the farm, it needs to break down for at least 3-6 months before you can safely add it to your garden. If you buy farm manure in the spring, just keep it in a pile and apply it at the end of the fall season. Many people incorporate manure into their compost to create a hearty mix.
- Use organic fertilizers. These are better for the plants and for the environment. Don’t be put off by the low numbers on the organic fertilizers—these represent the percentage of nutrients that are initially available to the plant. There are more nutrients in reserve that are bound and will slowly be released, providing a moderate and constant flow of nutrients. Inorganic fertilizers that have high numbers give the plant an abrupt blast and then it goes through withdrawal; you have created a plant junkie that suffers from a feast-or-famine syndrome. Consistency is always best for your little green friends. Take a look at the ingredients to see what is in your fertilizer: seaweed and kelp provide great micronutrients; green sand is rich in potassium; phosphate rock has good mineral content; compost and dried whey are popular organic materials.
To learn more about how you can help the planet…
Read More
Posted in Gardening Tips on April 13 2009, by Sonia Uyterhoeven
Fragrant Daffodils
 Sonia Uyterhoeven is Gardener for Public Education at The New York Botanical Garden.
 Daffodils are a harbinger of spring. They brighten up the dreary days starting in March and run through to the end of May. While they are immortalized for their cheery colors—traditionally pure yellows, now increasingly in white with orange, pink, and even green trimmings—some of these spring glories are fragrant.
The fragrance can range from peppery to citrus. The large-cupped daffodil named ‘Fragrant Rose’ as suggested has a nice rose smell. ‘Sir Winston Churchill’, a nice double, has a citrus fragrance.
Jonquilla, Tazetta, and Poeticus daffodils—divisions 7, 8, and 9 (daffodil classification is based on shape and size of the flower; the American Daffodil Society identifies 13 divisions)—tend to be the most fragrant. Among their ranks are: ‘Intrigue’, ‘Fruit Cup’ ‘Pipit’, ‘Stratosphere’, ‘Geranium’, ‘Hoopoe’, ‘Falconet’ and ‘Actaea’.
The choice is much wider and there are daffodils in other divisions that are also known for their scent: the doubles such as ‘Cheerfulness’ and ‘Yellow Cheerfulness’ in division 4; the large-cupped daffodils in division 2, boasting ‘Charlton’, ‘Sweet Charity’, and ‘Louise de Coligny’; and the pure white ‘Thalia’ from the Triandrus daffodils in division 5.
Come visit the Garden and stroll down the Daylily/Daffodil walk by the Visitor Cafe to find your favorite. We also have a beautiful display on Daffodil Hill and another collection, the Murray Liasson Narcissus Collection, behind the Watson Education Building heading toward the Magnolia Collection.
Posted in Gardening Tips on April 6 2009, by Sonia Uyterhoeven
Planting Peas
 Sonia Uyterhoeven is Gardener for Public Education at The New York Botanical Garden.
Successful gardening is about being in sync with nature. Plant your peas on St. Patrick’s Day is the old adage that has been passed down to gardeners in the tri-state area. While this works for some, I have often found the ground to be too soggy and wait until April 1.
We add compost and aged manure into the beds in the fall so that we are all ready to go in the spring. Remember to mulch your peas with straw before the weather gets too hot, or alternatively, shade their roots with lettuce to keep them cool; the cool, moist soil helps to lengthen the harvest.
Fresh peas are as sweet as candy. Harvest the peas before they get too old, otherwise they will become starchy. Look for swelling pods where the peas are just starting to fill up but before the pod is completely full. Hold the plant with one hand and gently pull off the peas. Once the peas mature, it behooves you to harvest daily.
Early in the season is not only the time to grow shelling peas but also snow peas and snap peas with their edible pods. Once you have harvested your peas, you can replant the area with the pole beans that will fill the space and provide you with another delectable harvest.
Remember that all legumes are great team players in the garden; they are experts at capturing atmospheric nitrogen and storing it in their roots. This nitrogen will eventually be released into the soil for other plants to use.
Peas love to grow on trellises. Last year we experimented with several different kinds. For one pea we used pea stakes. In England, they generally coppice birch or hazel to get pliable stems with a good branching structure. I didn’t have that available so I tried the long stems of my butterfly bush (Buddleja) that I cut back every April. The stems were more brittle than I would have liked, but they worked well and provided the support the peas needed.
Another support that I use in the garden is the arbors that decorate the raised beds. The peas climb up the sides of wire cloth wrapping their tendrils around the wire framework and hoisting themselves up to the top. This system always works well as it gives the peas plenty of light, air circulation, and space to grow.
I also tried some wonderfully decorative trellises purchased from a Vermont-based catalog company called Gardener’s Supply Company. They were inexpensive and elegant. My favorites for the peas were the expandable willow trellises. They scampered up the sides only to be replaced mid-season with morning glories (Ipomoea), bitter melons (Momordica), and a host of other summer vines.
Some nice pea varieties to try are ‘Mr. Big’, ‘Maxigolt’, ‘Amish Snap’ (snap pea), ‘Sugar Snap’ (snap pea), ‘Oregon Giant’ (snow pea), and a delightful dwarf cultivar called ‘Tom Thumb’.
This year I am dabbling with some colorful heirloom varieties. ‘Golden Sweet’ has two-toned purple flowers and lemon-yellow pods. It is an edible podded pea that is excellent for stir frying. ‘Blue Podded Shelling’ is another stunner that is used in soups. Both of these heirlooms reach 5-6 feet in height and will need good trellising
Included in the mix is ‘Green Arrow’, a reliable English variety that reaches 2-2.5 feet tall. I am growing this shelling pea, a heavy producer, to add some flavor to my pasta dishes this spring. This is a great variety for hungry homeowners with limited growing space.
Posted in Gardening Tips on March 30 2009, by Sonia Uyterhoeven
Pruning Roses
 Sonia Uyterhoeven is Gardener for Public Education at The New York Botanical Garden.
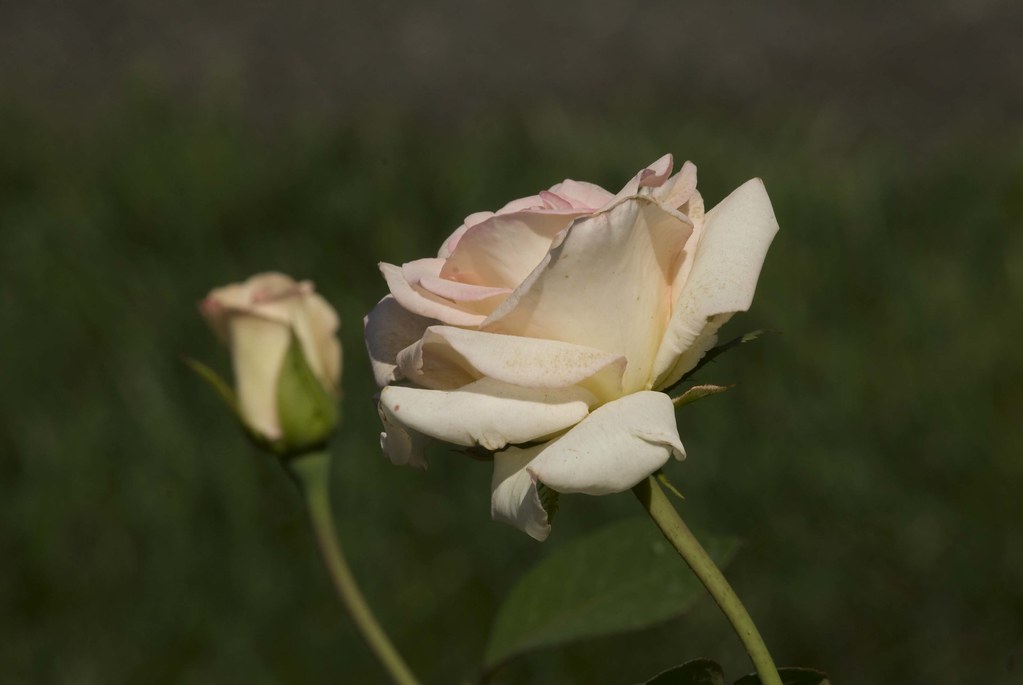 Common sense and experience tell us that a stitch in time saves nine. The same principle applies to pruning: A knick in time saves nine. This being the case, when is the best time to prune your roses? Traditionally, we go out and prune the roses when the forsythia starts to bloom. The reality is that you can go out anytime during late winter and early spring to cut back your repeat-blooming roses.
With springtime pruning, you are trying to conserve the plant’s energy. Watch your roses (or for that matter your Buddleja, Caryopteris, Hydrangea paniculata and whatever else you are planning to hack back), and wait until the buds begin to swell. This signals the initiation of growth and that it is a good time to jump in with the pruner’s saw. Do not wait until new branches begin to emerge, otherwise you will just end up cutting off new growth that has expended valuable energy—and it will go wasted.
Before you begin, remember these important rules:
- Always cut out dead, damaged, and diseased wood first.
- Remove any crossing or congested branches to enhance circulation
- Then work from there.
Modern hybrids are fairly forgiving; you can cut many all the way to the ground and they will sprout again. In general, the harder the pruning cut the more vigorous the new growth. We cut most of our hybrid teas back to 8–12 inches (depending on the rose and the winter damage). Larger shrub roses are generally cut back by one-third.
We prune the roses back to an outward facing bud. This bud generally indicates where the new growth will come from. In roses it is important to create a nice open framework, so that you want the branches to be growing in an outward, vase-like fashion. Make the cut about one-quarter inch above the bud. If you cut too close to the bud, you may end up damaging the bud. We often cut the cane at a 45-degree angle facing away from the bud so that it will encourage rainwater to run off away from the new growth.
Remember that these rules only apply to repeat-blooming roses. Old-fashion roses that flower once per season are pruned immediately following flowering. These roses flower on old wood. If you prune them early in the season, you will be removing the flowers for the season. Old-fashioned roses have congested canes removed after flowering, and they are shaped and often cut back by one-third.
Don’t be afraid to prune your roses; they are fairly forgiving. Experiment to see what works best in your garden, and enjoy the learning process.

 Tropical plants make wonderful specimen plants for a container or a welcome and exotic addition to your perennial border. Cannas and bananas are two of the most popular candidates. Both thrive when placed in sunny conditions away from the wind. Many of the variegated cannas such as Canna ‘Stuttgart’ do best when given some afternoon shade.
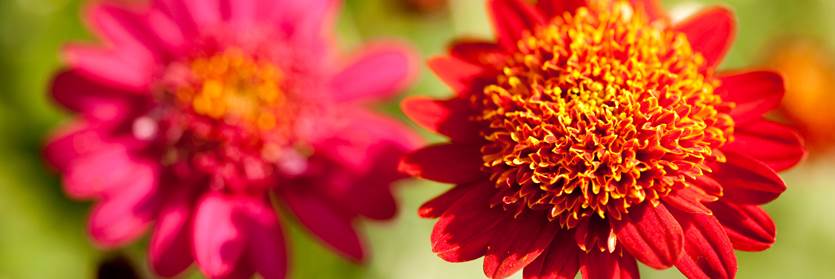

 Lilacs have been a staple of the home garden for hundreds of years. They flourished and were coveted by founding fathers such as Thomas Jefferson and George Washington. The popularity of lilacs comes as no surprise
 Spring is a season of anticipation and joy. Cheerful bulbs emerge from the ground and cover the landscape with color. Flowering trees and shrubs follow suit in one of the year’s most magnificent displays. As the season unfolds, everything takes its turn providing a symphony of color
 Who’s afraid of the hemlock woolly adelgid? Certainly, many gardeners in the Northeast. Like many pests that plague us, these little creatures were introduced from abroad. In their homeland (Japan) they are kept in check by a type of ladybug that is a natural predator. Here in the United States, though, the woolly adelgid has free range. The only natural challenge it faces is extreme temperatures—once the thermometer drops below 23°F or -5°C, the mortality rate of these fluffy little critters rises.
