Create Your Own Chrysanthemum Bonsai with a Slab Planting
Posted in Exhibitions, Kiku, Learning Experiences on October 28 2009, by Plant Talk
Follow this Step-by-Step Guide by NYBG Adult Education Instructor
 |
John Capobianco, an instructor in the Adult Education Program of The New York Botanical Garden, is a four-time national gold medal winner for chrysanthemum bonsai display. He is president of the Long Island Chrysanthemum Society, a past president of the Bonsai Society of Greater New York, and a board member of the National Chrysanthemum Society. |
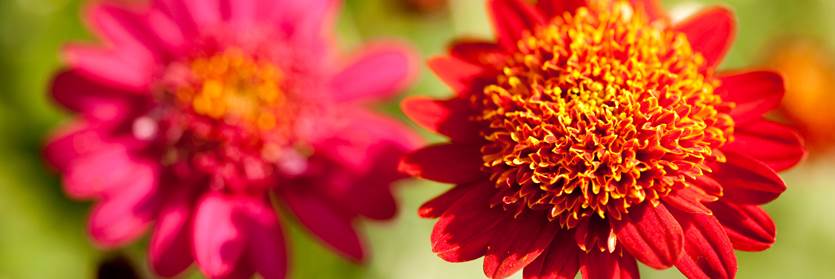
 As Kiku in the Japanese Autumn Garden makes apparent, chrysanthemums are among the most versatile woody perennials around. They lend themselves to being trained into many different forms.
You can try your hand at chrysanthemum bonsai by creating a slab planting—an arrangement done on a relatively flat stone to depict a lone tree on a cliff or a forest on an island or whatever you may imagine.
Unlike other forms of bonsai, slab plantings start with the container, in this case a flat rock or ceramic piece. It should be oblong; one with steps, crags, or an irregular outline makes it more interesting. Stones have movement and a flow to them. Examine the stone and choose the position you wish to highlight and harmonize with the planting.
Decide on the cultivar you want to grow, and get to work making cuttings or placing an order. Plan on growing more than you will need as some will get damaged and be unusable when it comes time to assemble the planting. Expect to reject about 50 percent of what you grow. You’ll want to use an odd number for the planting group, which makes for a more stimulating design.
To grow your chrysanthemum “trees,” put plants in a few different-size containers—2½ , 3, 4, and 6 inches. Much like the myth about goldfish, the mums will only grow to the size of their environment. Those in the small containers will have less water and nutrients and so won’t grow as thick or as tall. This will ensure that your trees will be of different heights and thicknesses in the group planting.
Pinch the plants to encourage branching into a tree form. If the line of a trunk needs to be altered, you may need to wire the plant to the desired form. This takes skill. Be careful not to break branches, and don’t trap leaves under the wire. Practice on your rejects.
While you are growing the chrysanthemum trees in their nursery containers, you should begin mentally designing the placement of the trees on the slab. This will help you to work on branch placement and definition of form for at least your two lead trees.
After a summer of watering, feeding, pinching, wiring, and shading, it’s time to assemble the planting. Get your slab, and get ready to make a mess. You’re going to need to make something we call “peat muck,” a goopy concoction of peat moss, fine soil, clay, and Superthrive®, a vitamin hormone complex that stimulates root growth.
You’re going to mold a retaining wall to hold the soil in place, because you are going to plant directly on the surface of the slab, without drilling holes for planting or drainage and without the aid of anchoring wires. Once the retaining wall is in position, place on the slab a layer of your favorite planting medium, one that holds water well and is consistent with the medium that you grew the plants in.
Now it’s time to place the trees. When constructing a group planting, the No. 1 tree sets the tone for the planting. It is usually your thickest—and often tallest—tree. Place this No. 1 tree either left or right of center. Place the No. 2 tree slightly behind the plane of the first tree. Continue with the rest of the trees until you have arranged a grouping that avoids the following: 1) trees directly behind one another, 2) trees on the same horizontal plane, 3) trees arranged in squares, 4) thick trees behind thin trees, 5) trunks crossing in front of other trunks, 4) trees equidistant from one another.
The slab planting pictured at right I grew with the intention of exhibiting. I placed the trees on the slab approximately 6½ weeks before the show, giving the trees plenty of time to knit their roots together and to look like an established planting.
In a group planting, branches that face in to the planting or that cross other trees are usually removed, the logic being that in an old growth forest branches between trees are shaded out and die. This will go a long way toward creating the illusion of an aged group.
As you work, put soil around the trees to hold them in place and underneath if you want to raise them up. The trees in the front of the planting should be the tallest and thickest, the ones in the rear should be shorter and thinner. The trees in the front should be placed more widely apart. Once the trees are in position, you can alter the retaining wall—lower it a little here, move it out a little there—so that it looks natural and not like an earthen dam, even though that’s what it is.
The groundcover should accentuate the roots of the trees. The one I use the most is selaginella, a shallow-rooted groundcover. Whichever you use, selaginella, moss, or baby tears, place it in between the roots.
The final dressing for the planting is sand. I use two types: tan, all-purpose builder’s sand and white, pool filter sand. The tan sand is used to accent rootage and to intimate foot paths and riverbanks. The white sand is used to intimate running water. When you place the sand, use it sparingly and trail it off into the distance of the planting and curve it behind a group of trees. You want the sand to help take the viewer on a hike through the woods; avoid straight lines that lead the viewer out of your grouping.
The creation of bonsai and landscape plantings should be fun. You should enjoy the process and learn something along the way.
John Capobianco will teach a one-day workshop, Japanese Maple Bonsai, at The New York Botanical Garden on Saturday, November 14. For more information or to register, call 718.817.8747.
