Morning Eye Candy: Not So Plain Plane
Posted in Photography on August 5 2011, by Ann Rafalko
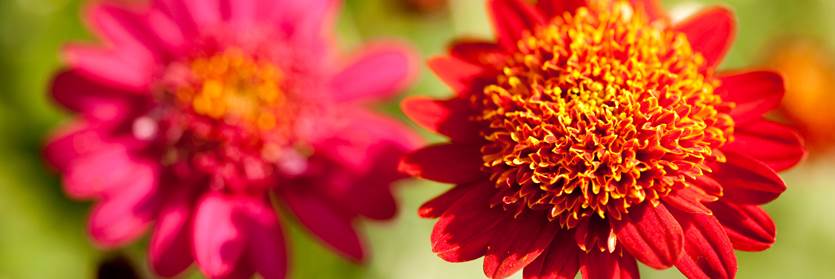
The seed of the London plane tree is anything but plain.

Platanus x acerifolia ‘Pyramidalis’ (photo by Ivo M. Vermeulen)
Inside The New York Botanical Garden
Posted in Photography on August 5 2011, by Ann Rafalko
The seed of the London plane tree is anything but plain.
Platanus x acerifolia ‘Pyramidalis’ (photo by Ivo M. Vermeulen)
Posted in Shop/Book Reviews on December 16 2010, by Plant Talk
 and Doug Muller (left)") Ken Greene, co-founder of the Hudson Valley Seed Library, is one of the most honest plant people we’ve ever met. Ken cares about plants in a way that is inspiring, moving, and intoxicating. At the Hudson Valley Seed Library he and his band of seedy friends are leading a full-blown local seed revolution. The Seed Library is a throwback to a time when seed sellers put fascinating pictures on their packages and pithy descriptions in their catalogs, to a time when every kitchen gardener saved his or her favorite seeds and passed them down from generation to generation. To that end, the Seed Library sells memberships (ed. note: we think a Seed Library membership makes a great holiday gift!) that offer discounts to those growers who return some of their seeds to the Library in an effort to expand the pool of Hudson Valley-grown varieties. Ken also commissions a group of local artists each year to illustrate beautiful Art Packs for a handful of varieties.
Ken Greene, co-founder of the Hudson Valley Seed Library, is one of the most honest plant people we’ve ever met. Ken cares about plants in a way that is inspiring, moving, and intoxicating. At the Hudson Valley Seed Library he and his band of seedy friends are leading a full-blown local seed revolution. The Seed Library is a throwback to a time when seed sellers put fascinating pictures on their packages and pithy descriptions in their catalogs, to a time when every kitchen gardener saved his or her favorite seeds and passed them down from generation to generation. To that end, the Seed Library sells memberships (ed. note: we think a Seed Library membership makes a great holiday gift!) that offer discounts to those growers who return some of their seeds to the Library in an effort to expand the pool of Hudson Valley-grown varieties. Ken also commissions a group of local artists each year to illustrate beautiful Art Packs for a handful of varieties.
As you can tell, we really like Ken and the Seed Library (And we’re not alone. Check out this great profile from the New York Times). They’re helping preserve local plant diversity and educating a new generation, teaching them that gardening isn’t just a way to eat good food, it’s also a thoughtful act that resonates through generations. We were delighted when Ken agreed to share his list of “Favorite Things” for holiday giving. As you’ll see, Ken always has seeds on his mind. Who knew seeds could act as inspiration for such beautiful gifts?
Posted in Photography on December 12 2010, by Plant Talk
It’s seed catalog season again! Tell us: Which are your favorites?

Seeds at the Nolen Greenhouses (photo by Ivo M. Vermeulen)
Posted in Gardening Tips on November 30 2010, by Sonia Uyterhoeven
 |
Sonia Uyterhoeven is Gardener for Public Education. |
We have spent the past few weeks talking about cleaning and storing your seeds. I mentioned a few blog entries ago that a simple way to clean and store tomato seeds is to squeeze out the contents of the tomato and soak it in water – washing away any coating that surrounds the seed. You then dry the seeds on a paper towel and store.
Aficionados have a more elaborate method of cleaning tomato seeds that involves fermentation. Tomato seeds are surrounded by a jelly-like coat that contains a germination inhibiting substance. The coat prevents the seeds from germinating too early so that tender seedlings do not emerge in the fall or winter.
Fermentation also protects the seeds against bacterial canker and is a good way of ensuring that your seeds are disease free. Fermentation is not the only way to control seed-borne diseases. Washing seeds in plain water, in salt water, in hot water (around 122°F – boiling water is 212°F – so this is just hot water) for 15 minutes are all methods for controlling seed-borne diseases.
The process for fermenting tomato seeds is simple. Scoop out the seeds and all the pulp and juice into a glass jar. Cover the seeds with water and set the seeds aside storing at room temperature. Check daily and stir the mixture. After 3-4 four days the viable seeds will have sunk to the bottom and the pulp and any poor quality seeds will have floated to the top (they are lighter). Pour off the gunk from the top; strain out the seeds and rinse in a sieve.
Dry on a paper towel and store in a Ziploc bag or plastic container in a cool, dark place. The seeds will stay viable for up to 4 years. Remember not to store your F1 hybrids as they will not come true to seed. Your heirlooms are ideal for storing. Most tomatoes are self-pollinating but you do get cross-pollination from time to time.
If you want to make sure that your tomatoes don’t cross-pollinate you can create a barrier by covering them with a pollination cage – use remay or a fine mesh screen so that bees will not be able to your plant – or you can space different varieties at a good distance from each other. There is a difference in opinion on spacing – some say 10 feet is sufficient – others 25 feet and some say for truly pure seeds you need up to 100 feet. For the homeowner, crossing of heirloom seeds should not be a major issue – leave that concern for the grower.
Posted in Gardening Tips on November 22 2010, by Sonia Uyterhoeven
|
Sonia Uyterhoeven is Gardener for Public Education. |
In my last blog I mentioned that conditions for proper seed storage are basically the opposite of what seeds need to germinate. To grow they need moisture, warmth, and light; for storage they need cool temperatures, dry atmosphere, and darkness. Most seeds will last for about three years if stored properly—often they last much longer.
What should you do if you have some seeds that have been lying around for several years and you are not sure if they will germinate? There is a simple way to test a seed’s viability before you prep your seed trays and waste your seed sowing medium on something that has little life left in it.
Moisten a few paper towels with water. Place a dozen or so seeds spaced apart on the towel. Then either hold on to one of the edges of the paper towel and roll it up into a spiral, or place a few damp paper towels on top to create what looks like a seed-germination sandwich. Either way the seeds need to be encased on both sides by damp paper towels.
Posted in Gardening Tips on November 15 2010, by Sonia Uyterhoeven
|
Sonia Uyterhoeven is Gardener for Public Education. |
Last week I blogged about the process of collecting seeds. Once gathered, the seeds will need to be cleaned and dried before they can be stored.
Some seeds require only minimal cleaning while others need more attention.
If you are collecting seeds from non-fruiting plants, gather the seeds on a dry day. Spread the seeds on newspapers, in a cardboard box, or in an old telephone directory, and allow them to dry between one and three weeks.
Often seeds need to be separated from the chaff (the seed casings and debris). You can do this with a pair of tweezers; not all of the chaff needs to be removed, but just cleaned off a bit.