Inside The New York Botanical Garden
gardening tips
Posted in Gardening Tips on December 6 2010, by Sonia Uyterhoeven
 |
Sonia Uyterhoeven is Gardener for Public Education. |
One of my colleagues recently asked me about Jerusalem artichokes. Jerusalem artichoke (Helianthus tuberosus) is neither from Jerusalem nor an artichoke. The origin of the common name is unclear but there are a few theories floating around. Some say that this native North American relative of the sunflower may have been labeled Jerusalem since it fed the pilgrims and was part of the ‘new Jerusalem’. Another theory is that when this Native American was exported to Europe it was given the Italian name ‘Girasol’ meaning sunflower which then morphed phonetically into Jerusalem. The moniker artichoke comes from its taste.
As a member of the sunflower family, Jerusalem artichokes or sunchoke love the sun. They are hardy from zone 2 to 9. Sunchokes are perennial and fit into the category of ‘once you have it you can’t get rid of it’. They can grow up to 12 feet tall and are covered with small yellow sunflowers. The edible part of the plant is a tuber which looks like a cross between a fingerling potato and ginger root.
Plant the tubers in the spring setting them 3-5 inches deep and 18 inches apart. Amend the soil with compost or aged manure for the planting year and then top dress in subsequent years. Cover the bed with a good layer of straw mulch to suppress weeds and retain moisture. Because of their magnificent height it is best to place them on the north side of your vegetable garden where they will not shade out other plants.
Due to their tenacious growth habit many people plant them in a bed of their own. The tubers are dug in the fall. It is best to wait until after they are cut back by the frost since the flavor improves with the cold. The easiest way to harvest is to dig up what you need with a spading fork and keep the bed mulched so you can dig as needed throughout the season. There will always be a number of strays or escapees that then provide your crop for the following year.
Jerusalem artichokes contain no starch. They are ideal for diabetics and people who are watching their calories. The tubers can be steamed, stir-fried, roasted, pureed, pickled and even eaten raw. They pair wonderfully with parsnips and beets at this time of year and are a wonderful addition to a good winter soup. They have a sweet, nutty flavor that is worth a try.
Posted in Gardening Tips on November 30 2010, by Sonia Uyterhoeven
|
Sonia Uyterhoeven is Gardener for Public Education. |
We have spent the past few weeks talking about cleaning and storing your seeds. I mentioned a few blog entries ago that a simple way to clean and store tomato seeds is to squeeze out the contents of the tomato and soak it in water – washing away any coating that surrounds the seed. You then dry the seeds on a paper towel and store.
Aficionados have a more elaborate method of cleaning tomato seeds that involves fermentation. Tomato seeds are surrounded by a jelly-like coat that contains a germination inhibiting substance. The coat prevents the seeds from germinating too early so that tender seedlings do not emerge in the fall or winter.
Fermentation also protects the seeds against bacterial canker and is a good way of ensuring that your seeds are disease free. Fermentation is not the only way to control seed-borne diseases. Washing seeds in plain water, in salt water, in hot water (around 122°F – boiling water is 212°F – so this is just hot water) for 15 minutes are all methods for controlling seed-borne diseases.
The process for fermenting tomato seeds is simple. Scoop out the seeds and all the pulp and juice into a glass jar. Cover the seeds with water and set the seeds aside storing at room temperature. Check daily and stir the mixture. After 3-4 four days the viable seeds will have sunk to the bottom and the pulp and any poor quality seeds will have floated to the top (they are lighter). Pour off the gunk from the top; strain out the seeds and rinse in a sieve.
Dry on a paper towel and store in a Ziploc bag or plastic container in a cool, dark place. The seeds will stay viable for up to 4 years. Remember not to store your F1 hybrids as they will not come true to seed. Your heirlooms are ideal for storing. Most tomatoes are self-pollinating but you do get cross-pollination from time to time.
If you want to make sure that your tomatoes don’t cross-pollinate you can create a barrier by covering them with a pollination cage – use remay or a fine mesh screen so that bees will not be able to your plant – or you can space different varieties at a good distance from each other. There is a difference in opinion on spacing – some say 10 feet is sufficient – others 25 feet and some say for truly pure seeds you need up to 100 feet. For the homeowner, crossing of heirloom seeds should not be a major issue – leave that concern for the grower.
Posted in Gardening Tips on November 8 2010, by Sonia Uyterhoeven
|
Sonia Uyterhoeven is Gardener for Public Education. Join her each weekend for home gardening demonstrations on a variety of topics in the Home Gardening Center. |
By this time of year, you probably have begun saving seeds of your favorite annuals and vegetables. Seed saving is fairly straight forward as long as you follow a few simple rules.
When collecting seeds in your garden, look for healthy plants that possess the characteristics you desire. If you have a pot marigold (Calendula) with a pale apricot color that you admire, collect seeds from the paler specimens to try and keep the nice shade. You will always get variation, but you are participating in the selection process as, in essence, an amateur breeder.
Many of your flowers and vegetables are cross-pollinated, Mother Nature’s way of passing along diversity. If you want the seeds to be pure, isolate the plant (generally by building a cage or covering for it) or pollinate by hand, but this is generally only necessary for commercial growers or for seed-saving enterprises.
Most important is to always choose healthy plants so that you end up with healthy, viable seeds. Don’t waste your time collecting seeds from F1 hybrids. They will never come true to seed, and you will get some strange results. Heirloom varieties, on the other hand, tend to be fairly stable and are wonderful to collect.
Read More
Posted in Gardening Tips on August 30 2010, by Sonia Uyterhoeven
|
Sonia Uyterhoeven is Gardener for Public Education. Join her each weekend for home gardening demonstrations on a variety of topics in the Home Gardening Center. |
 Lee Reich, author of The Pruning Book, an authoritative and accessible account of pruning techniques, gets part of his passion for pruning from his insatiable curiosity about and his desire to grow every type of fruit possible in the Northeast.
I was visiting his garden up in New Paltz in July and spent the day wandering through carefully caged and guarded blueberries (against the birds, not me) and arbors of grapes and hardy kiwis (Actinidia).The garden overflowed with fruit in all shapes and sizes ranging from alpine strawberries (Fragaria vesca) in containers and Nanking cherries (Prunus tomentosa) lining the driveway to medlars (Mespilus germanica) and cornelian cherries (Cornus mas) spotted around the garden.
One of the most breathtaking sites was his allée of pawpaws (Asimina triloba). They are small- to medium-size trees that grow to about 25 feet in height, with large, lush tropical foliage that is reminiscent of an avocado.
Read More
Posted in Exhibitions, Learning Experiences, The Edible Garden on August 26 2010, by Plant Talk
9-Year-Old Everett Sanderson Offers 9 Tips to Get Growing
 |
Elizabeth Fisher is Associate Manager for Education Marketing and Public Relations. |
 Everett Sanderson is a talented soon-to-be fifth grader who has spent most of his nine summers gardening in the Ruth Rea Howell Family Garden, helping his mom, Han-Yu Hung, who is Garden Coordinator of the Children’s Gardening Program. In the Family Garden, kids work hands-on growing fruits and vegetables, learning that food, fun, health, and teamwork are connected. This year their garden plots have been in the spotlight as part of The Edible Garden.
Unlike most 9-year-olds, Everett is an accomplished gardener and a lover of veggies. Harvesting is what hooked him at first: “I realized that in order to harvest, you have to grow it, and in order to grow it, you have to plant it,” said Everett. Gardening also helped him to love eating vegetables: “If you can plant it, you have a better chance of liking it.”
Now a veteran of the Children’s Gardening Program, Everett, who lives in the Bronx, started gardening at age 3 as a “Garden Sprout” and is now a “Garden Crafter,” leading gardening lessons and hands-on activities.
He shares these helpful tips for kids to get their own gardens growing.
Read More
Posted in Exhibitions, The Edible Garden on August 10 2010, by Plant Talk
Written by Burpee Home Gardens Team. Burpee Home Gardens is a Supporting Sponsor of The Edible Garden.
 Harvest time is an exciting time in the garden. Those plants you have been taking care of, feeding, weeding, and watering are now returning the favor with ripe pickings for you to enjoy. Very quickly you’ll have a kitchen counter or bushel filled with red and juicy tomatoes, tasty peppers, flavorful cucumbers, and more.
What to do with all this plenty—and when—present some of the last obstacles of the season for new vegetable gardeners. If you’re suddenly inundated with abundance, here are a few tips to remember to receive maximum flavor from your harvest:
Read More
Posted in Exhibitions, Gardening Tips, The Edible Garden on June 28 2010, by Sonia Uyterhoeven
|
Sonia Uyterhoeven is Gardener for Public Education. Join her each weekend for home gardening demonstrations on a variety of topics in the Home Gardening Center. |
 Last week I blogged about the historic and design aspects of ornamental vegetable gardens. This week I take a look at some of their basic features.
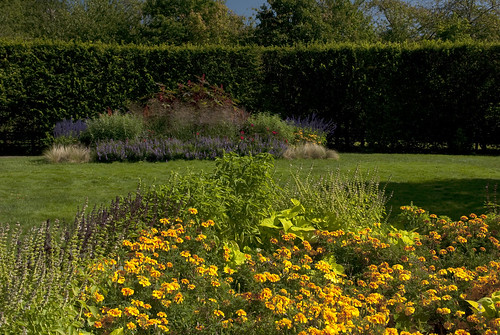
Many traditional kitchen gardens have some kind of boundary or enclosure that not only separates the garden from its surroundings but often provides a practical barrier to keep out unwanted pests. Classic boundaries include brick walls, stonewalls, wooden fences, wattle or woven fences, and hedges.
A simple split-rail wooden fence lined with chicken wire to keep out rabbits surrounds the vegetable garden in the Botanical Garden’s Home Gardening Center (see photo). “A flat-top picket fence would give it a Colonial feel, while a more open and rustic setting could be created by a zigzag wooden fence,” says Chris from a fence company in Louisville, KY. The hardscape of the garden will help set the mood and contribute to the overall design. Enclosure creates a sense of intimacy and gives a framework to your garden.
Read More
Posted in Gardening Tips on May 24 2010, by Sonia Uyterhoeven
|
Sonia Uyterhoeven is Gardener for Public Education. Join her each weekend for home gardening demonstrations on a variety of topics in the Home Gardening Center. |
The craft of flower pressing began hundreds of years ago in China and Japan, where flowers were pressed between sheets of rice paper weighed down with heavy stones. Pressed flowers were highly valued for their decorative qualities.
In the West, plants were collected and pressed for scientific as well as ornamental purposes. Botanists created herbaria, collections or libraries of pressed plants, for research and teaching. With proper care, these collections preserve plants for centuries. When in her teens, Emily Dickinson created her own herbarium, a digitized version of which can be seen in the Gallery exhibition of Emily Dickinson’s Garden: The Poetry of Flowers.
Collecting and pressing flowers was a popular pastime in the United States during the 19th century, when there was an abundance of open land. Today urbanization and the damaging effects of herbicides and pesticides threaten our native flora. It is important when collecting plants to make sure that they grow in abundance. Never collect plants in parks or protected areas. The best place to collect is in your own garden.
Pressing flowers is a beautiful way to preserve memories of the growing season. The decorative uses for pressed flowers are limited only by your creativity. They can be framed or used to adorn note cards, writing paper, book covers, bookmarks, paperweights, candles, placemats, and more.
Read More
Posted in Gardening Tips on April 12 2010, by Sonia Uyterhoeven
|
Sonia Uyterhoeven is Gardener for Public Education. Join her each weekend for home gardening demonstrations on a variety of topics in the Home Gardening Center. |
 The care of your garden depends on your cultivation practices, how you are using the space, what you are growing (trees, shrubs, perennials, vegetables, annuals), and how intensively you are gardening. It is also influenced by soil conditions and your microclimate.
One of the latest trends in gardening (although not new) is that the soil is a dynamic, living system that needs to be managed, not by pouring harmful chemicals and salts into it, but by supplying it with its nutritional and cultural needs. Healthy soil means healthy plants—plants grown in fertile soil are less prone to pest and disease problems.
Read More
Posted in Gardening Tips on January 19 2010, by Sonia Uyterhoeven
Keep These in Mind When Faced with the Season’s Onslaught of Catalogs
|
Sonia Uyterhoeven is Gardener for Public Education. |
 Now is the time of year that every good gardener gets inundated with new catalogs. For the plantaholic it’s a blessing and a curse. The feeling of a kid in a candy store is rekindled in even the most reticent gardener. The curse is that there is never enough time, space, or money to satiate our herbaceous or woody appetites.
However, the cold winter months are an ideal time to dream of redesigning your garden. I love spreading all of my catalogs on the living room floor and getting to work on lists or colorful collages of plants. To help navigate this challenging terrain, here are lessons learned and a few guidelines.
Read More